
Materials Needed:
- Plastic Wrap (industrial-strength preferred for durability).
- Rope or Paracord (for anchoring and structure).
- Poles or Sticks (sturdy wood or bamboo for the frame).
- Knife or Multi-tool (for cutting and trimming).
- Heavy Rocks or Anchors (to secure the structure).
Step-by-Step Instructions:
1. Choose the Location
- Look for a calm and shallow water area with trees or rocks nearby for anchoring points. Ensure the water is not fast-moving or too deep for safety.

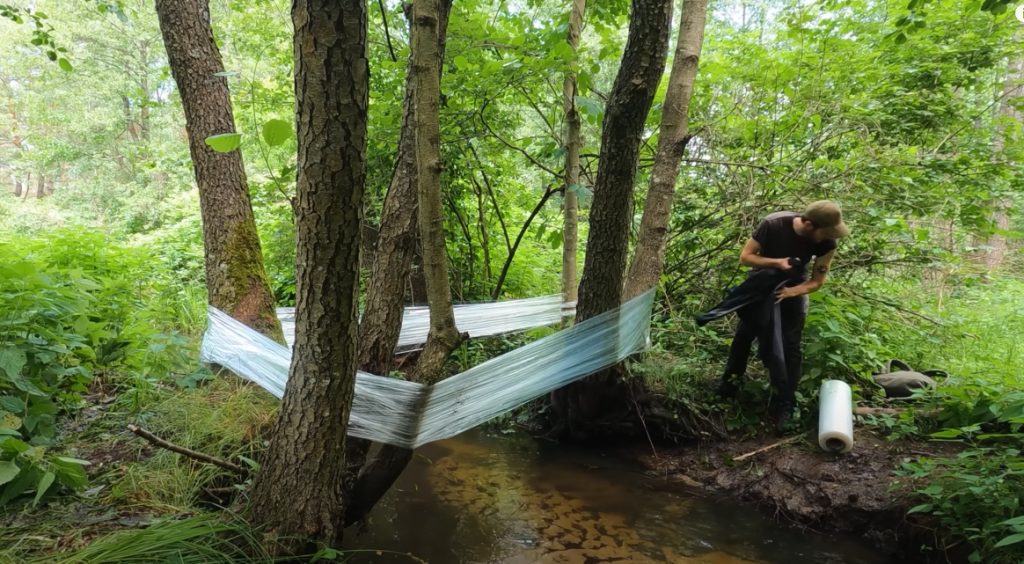
2. Create the Base Structure
- Use long, sturdy poles to form the foundation of the shelter. If trees are available on opposite sides of the water, they can act as natural anchors.
- Place poles parallel across the water, creating a framework that will hold the plastic wrap.
3. Anchor the Framework
- Use rope or paracord to securely tie the poles together and anchor them to trees, rocks, or stakes driven into the ground. This ensures stability.
- If over the water, secure the base tightly to prevent movement.
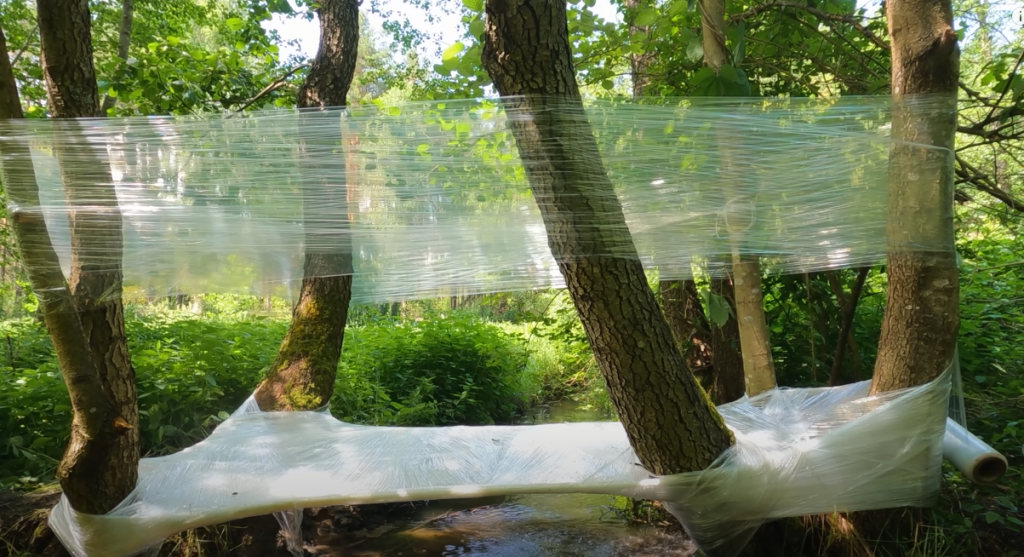
4. Wrap the Plastic
- Starting from one end, wrap the plastic wrap tightly around the frame. Overlap layers to strengthen the shelter and create a waterproof surface.
- Stretch the plastic to reduce sagging. For added strength, double-wrap areas prone to stress or sagging.
5. Create Walls and Roof
- Use plastic wrap to form walls and a roof. For the roof, angle it to allow rainwater to run off easily.
- Ensure the shelter is fully enclosed to protect against wind and rain while maintaining openings for airflow.
6. Secure the Structure
- Reinforce the edges of the plastic wrap with rope or duct tape if available, to prevent it from tearing in high winds.
- Use heavy rocks or weights to secure the ends of the plastic wrap to the ground or surrounding anchors.

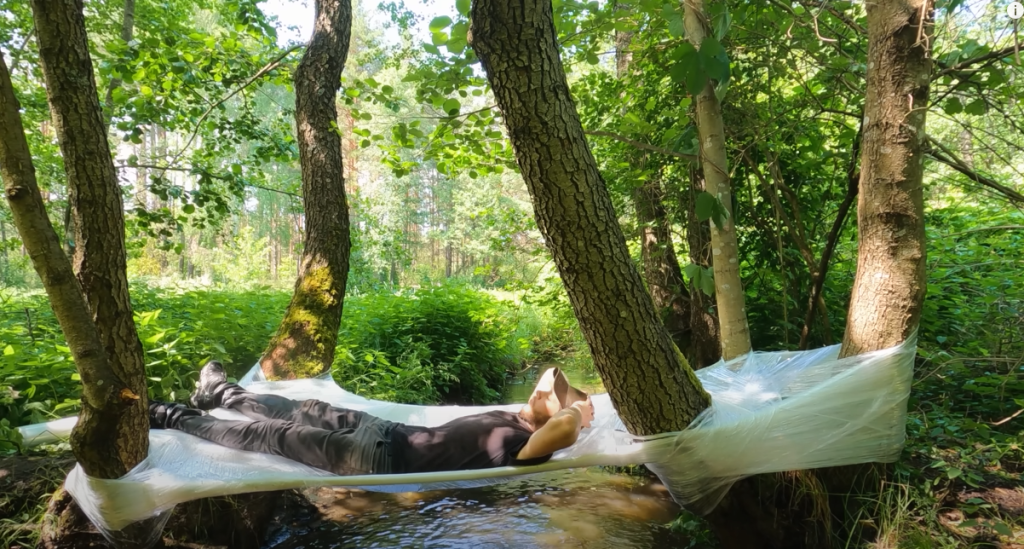
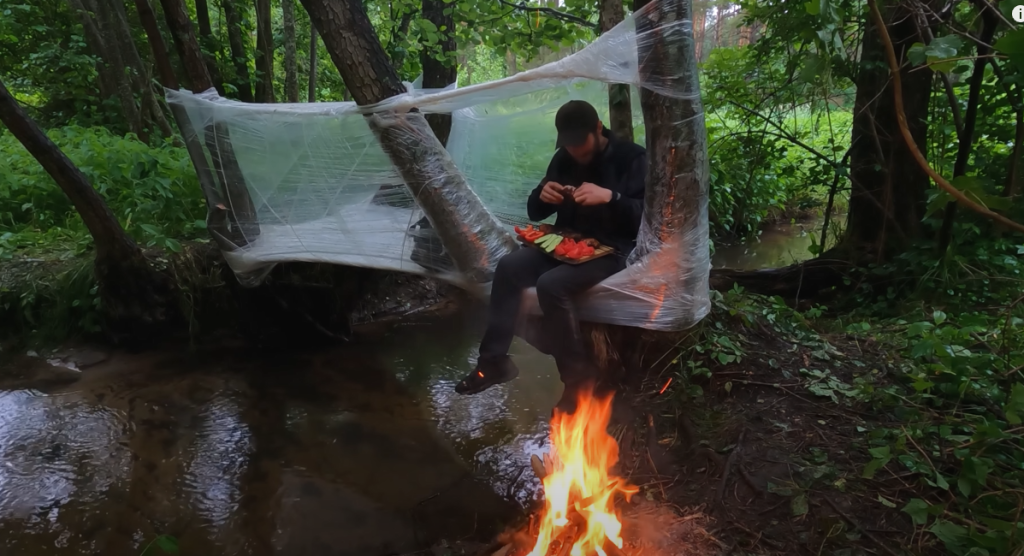
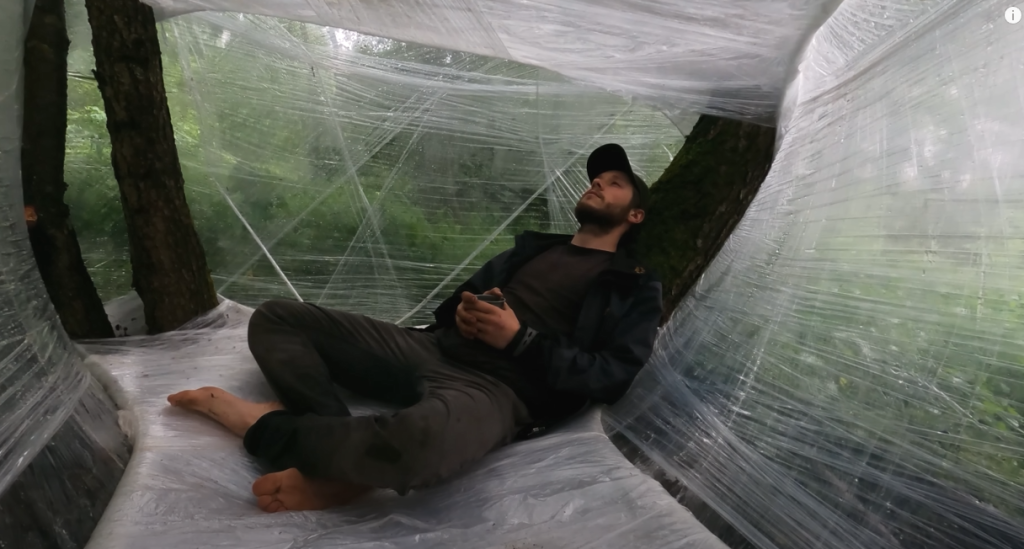
7. Relax and Enjoy
- Add a small platform or hammock inside to keep dry. Relax and enjoy the soothing sound of the water while resting in your unique plastic-wrap shelter.
Relaxing Camp Experience
This method combines creativity with utility, offering a minimalist yet effective bushcraft tent setup. The sound of the water and the reflective qualities of the plastic wrap add a tranquil, meditative ambiance, enhancing the overall camping experience.
Let me know if you’d like visuals or additional tips!